 I actually finished knitting my moss Cable Stocking about a week or so ago, but I must confess to giving in to displacement activity (yes, even the hoovering!) when faced with blocking it. I raced through the knitting, thoroughly enjoying the cabling and shaping and even felt a little sad when I realised I'd completed the 2 pieces (main 'foot' and cuff). I put it aside with every good intention of blocking it at the next opportunity and then promptly set about doing ANYTHING else but giving it the attention it deserved!
I don't have an abhorrence to blocking per se, but I nearly always find that I leave it until the eleventh hour even though I know that it is a necessary part of the creative process. As I mentioned in a previous post - it really can make all the difference between a beautiful hand-crafted item that you can be proud of and something shoddily put together that will be a constant reminder of a hastily completed project.
So, when the nagging voice at the back of mind became too persistent to ignore this weekend, I got out my blocking tools and set about transforming my wrinkly knitting into a fabulous stocking!
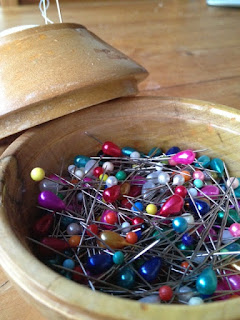
 I use a set of foam playmats to block on - the type that you can easily find in a toyshop for around £10-15 which provide the best base for sticking your pins into and are completely adaptable to most sizes. I also have blocking pins - these just need to be long with sturdy 'heads' to make them visible against your knitting - and I have a set of blocking wires that are the very best way to tackle more difficult projects like lace shawls. For the Stocking I only needed one of the blocking mats and some pins.
As you can see from the pictures - the Stocking is not the easiest shape to block flat! I advise you stretch the top, straight section and the 'instep' of the foot to maximise the look of the cables, and then leave the 'heel' as I've done because this area doesn't need so much attention.
Once I had pinned the pieces out to the measurements and was happy that it all looked straight and even - I sprayed the pieces with a solution of Soak and water. Soak is a no-rinse wool wash that helps to condition your handknits and give them a lovely scent too! You could equally use a steam iron to lightly dampen the pieces or cover them with a damp cloth and leave to dry overnight. All of these methods help to even out the stitches and 'persuade' your pieces to retain the shape you desire.
Don't be tempted to take the pieces off the mat until they are completely dry. As long as you have enough space to leave them, I would recommend leaving them overnight. Remember that any little dent or dimple made by a pin will probably end up dried in, so it's vital to pin out as smoothly as you can.
All that was left was to seam together and add the cuff. I always use mattress stitch where I can as it provides the most 'seamless' and professional finish. Et voila! my splendid mossy Cable Stocking just begging to be stuffed full of gorgeous gifts!
As most of you knitters will know, it's incredibly difficult to keep any of your finished items for yourself - particularly at this time of year! So, much as I love this mossy stocking, I'm going to fill it with some fun gifts and send it to a friend who I know will truly appreciate it . . . and then try to knit another one for myself before Christmas!
(posted by Max)


This is great, love the cables. Helpful guide to blocking too.
ReplyDeleteThanks for your kind comments. It was a good fun knit and will definitely be appreciated by the new recipient!
Delete