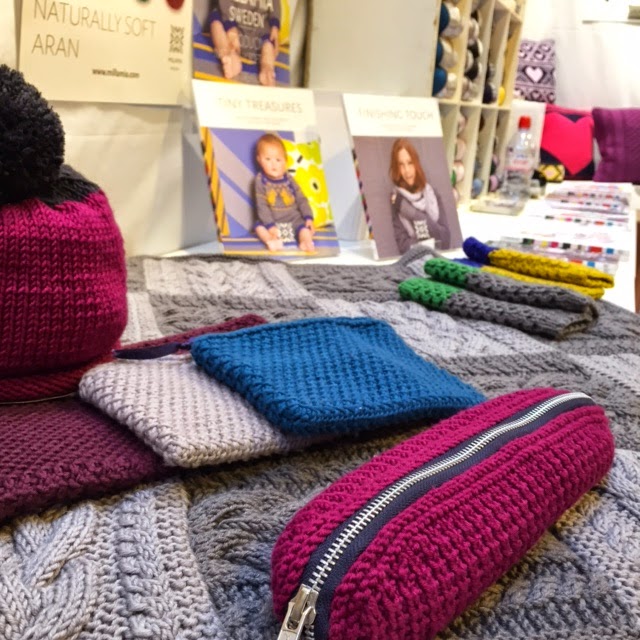
 When we first launched the new Naturally Soft Aran and supporting accessory collection, Finishing Touch back at the end of last year, I immediately conjured up a cold and bitter winter and me, all cosied up in swathes of sumptuous aran scarves and cowls. Such is the depth of my fantasy knitting life, that I had completed not one, but two of the beautiful, but seriously oversized Annette Scarves - one in Stone and one in Emerald, a Gullan Snood in Damson, a Bia Cowl in Cinder and Cherry Red and a pair of co-ordinating Elika Wristwarmers for every piece of neckwear . . . oh the delights of a healthy knitting delusion!
In reality, I did manage to knit LOTS of pairs of Elika Wristwarmers . . . which all went to well-deserving homes, but I didn't manage to cast on even one piece of neck adornment on my fantasy list. For one, and I make no excuses here, the weather just wasn't cold enough to prompt me into a frenzy of oversized scarf knitting. Much as I loved (nay yearned for) the luxurious weight of an Annette Scarf to swaddle myself in, it just didn't seem practical to expend all that knitting energy on something I could only wear occasionally in the mild English winter.
So, as you may remember I embarked on a cardigan by one of my favourite independent knitwear designers Bristol Ivy. This was of course, just as I had also cast on the Honey Honey Cushion, which in turn was quickly followed by my Big Love Cushion . . . I had three substantial MillaMia projects on the needles simultaneously and at one critical point began to wonder if any of them would see completion.
The Naturally Soft Aran gives such crisp stitch definition that the cables really pop
To cut a long story (and a lot of rows) short, I finished everything on time and am now the proud owner of a rather fabulous (and practical) cardigan in one of my favourite Aran colours - Stone. The Maeve is more of a shrug than a cardigan, and more of a wrap than a shrug . . . it almost defies description but I think you can see from the pictures that the shape is loose and fluid while still retaining an amount of structure that makes it comfortable and easy to wear. Of course, the star of the Maeve show is the exquisite cable detail which flows effortlessly around the front edge providing a collar and border all at the same time. The construction is fairly complex, if like me, you find it difficult to imagine flat pieces in their eventual 3D form, but Bristol provides good instructions, pictures and a diagram to help with putting the knitted pieces together.
The final elegant flourish is the addition of an applied I-cord around the entirety of the piece. I love the professional finish it gives to my cardigan, and it's incredibly easy to execute - though also worth bearing in mind that this technique requires a large number of stitches to be picked up really precisely around the entire edge. The quality and quantity of picked up stitches has a real impact on the finished edge, though happily Bristol also gives guidance on how to manage this effectively too.
I've provided a short tutorial here to demonstrate just how easy, and satisfying it is!
1) Cast on 3 stitches provisionally and put these on the left hand needle. It's important to cast these on provisionally as you will need to graft these together with your remaining 3 stitches at the very end.
2) Pick up stitches around the edge you want to apply the I-Cord.
3) Now there are 3 cast on stitches on your right needle and the rest of the picked up stitches on your left. Knit 2 cast on stitches and then ssk the last cast on stitch together with the next stitch on your left needle.
4) Slip these 3 stitches straight back to your right needle.
5) Continue as set - knit 2 stitches, ssk 1 cast on stitch and 1 stitch from the left needle and then slip these 3 stitches back to your right needle.
6) Graft your final 3 live stitches together with the 3 you provisionally cast on (you will need to unzip these) et voila!
 |
| 3 stitches on the right needle |
 |
| Knit 2 of the 3 stitches |
 |
| SSK the final stitch on the right needle with the next on the left needle |
 |
| Slip these 3 stitches back to the right needle to begin again |
 |
| The 'right side' of the applied I-cord |
 |
| The 'wrong side' of the I-cord edging looks super neat |
And just to prove that I did indeed finish it in time to wear at the UK CHSI trade show . . . here are Helena and I enjoying ourselves on the stand!
(posted by Max)


