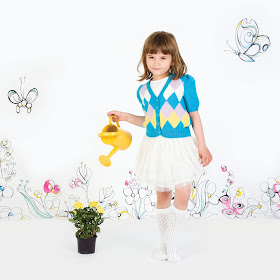
In my last post you may have noticed that I was VERY impressed with an article by Daniela Nii in knit.wear magazine. The technique in this tutorial is 'Shaped Intarsia' with the intent to show knitters another method of changing colours in order to avoid the jagged edges often found on the diagonal lines. Having avoided intarsia knitting to this point, in part due to the ugly diagonals (and also because my first attempt at 'wrapping the stitches' resulted in more holes than less), I was thoroughly excited at the prospect of finally mastering this colourwork technique with Daniela's method. I was due, I thought, for another colourwork epiphany.
 |
| Pia Cardigan from Little Rascals |
The premise of 'smoothing' these diagonal lines as you change colour, is to use sets of increases and decreases either side of the colour change. For example, a right slanting line involves knitting to 2sts before the colour change, decreasing by k2tog or ssk, twisting or 'wrapping' the 2 colours and then using a left lifted increase or a m1l to make up for the decrease and so keep the stitch count correct. For a left slanting line the principle is the same whereby you knit to 1st before the colour change, do a right lifted increase or a m1r, k1, twist the 2 colours and the decrease by ssk or k2tog. I will say at this point that your choice of increase and decrease will affect the 'look' of the edge as Daniela fully explains in the article - you will end up with 'decorative' or 'subtle' edges.
Now, in principle, this all sounded very straight forward to me, but as I began my swatches I realised that I hadn't grasped the technique at all. You can see my initial attempts below - the wraps are correct but my increases and decreases are disastrous and completely wrong where I didn't follow the instructions exactly and in my infinite wisdom misunderstood what she meant by 1st or 2sts before the colour change. You may think that this seems like a very simple and clear instruction, and it is, except that I began to overthink the process and ended up increasing a stitch and then knitting another stitch in the new colour, effectively colouring 4 stitches per row with the contrast colour, rather than the 2 stitches required.
Once I had worked it through (after many rows of more jagged edges than the standard method would have produced), I could see where I had gone wrong and rectified my mistake. It was definitely a useful exercise in the disciplined following of instructions for me, and so I thought you'd like to see this appalling first attempt! It's clear that the sections between 4 and 5 and between 2 and 3 are horribly wrong whereas in sections between 1 and 2 and 3 and 4 I had finally managed to master the technique.
In the following photo, you can see that I have completed 2 diamonds, one using Daniela's method and the other following the standard intarsia technique. Having the 2 to compare, I have to say that I'm not now entirely convinced that the smooth edges add anything more appealing to the overall effect. I'm pleased with the result, and yes, it is a beautifully smooth edge BUT there seem to be some other issues that I hadn't reckoned on. Firstly, the smooth edge comes at the expense of some quite accentuated bumps or ridges where the decreases sit and secondly the diamond is noticeably smaller than the 'standard' one. Thirdly, I had real trouble at the bottom of the diamond when I only had a single stitch and needed to increase and decrease in this very small area neatly - I may be able to work through this problem satisfactorily with some practice but then when I came to the top point of the diamond, decreasing from 3sts to 1st I had to use re-use a stitch I'd already knitted to provide a st to pair for a k2tog. This is rather untidy, and also made me consider how this might also impact on a series of diamonds in an argyle pattern - would each point at top and bottom prove problematic? I confess that my inexperience in this method may very well be the only issue here, but I think I still need some convincing.
(posted by Max)


I've been trying to work through "designing" (....if you can call it that!) a pattern of my own using shaped intarsia, and have been banging my head against a wall on how to get points at the tops and bottoms of some chevrons/arrows. I was SO happy to find your blog post and get some insight that perhaps it's just a "head-banging"-style problem of the two elements combined together. Thanks again for such an in-depth, informative post!!! =) <3
ReplyDelete