Friday, 28 March 2014

HANDARBEIT AND HOBBY - report from Cologne

Helena and I in Cologne
It is always exciting for us to travel to Cologne for the annual Handarbeit and Hobby trade show. Drawing such an international audience really does make it THE trade show of the year and attracts a huge diversity of exhibitors and visitors. We had the opportunity to meet with buyers from as far afield as Korea, Russia, the Netherlands, Finland and Belgium, as well as catching up with a few of our stockists from Germany.

We were rather disappointed with the location of our stand this year. As you can see from the picture below, there was an enormous pillar right in the middle of the stand which wasn't at all what we had expected! Although next year we are hoping to be much closer to Christphorous Verlag, the German publishers who are currently translating Wonderland into German - an exciting development for us and one that our prospective German stockists were so thrilled to hear.

Before and after - what a transformation!
 
 
 That pillar . . .

Aside from the vast array of stands with everything from fabric, yarn and crafting accessories this Show excels at putting on an excellent fashion show and Saturday night entertainment. Helena went along to the fashion show but was stopped in her tracks outside by a flashmob dance group organised by the Boshi Boys - see the short video below . . .


The Boshi Boys proved to be really on trend at this years' Show - a crochet concept for cool, colourful hats that has filtered through to other brands. I imagine that the trend for these fun beanies straight from the snowboarding slopes will last for a good while yet.

As well as a business trip, this was a great excuse for Helena and I to spend some time together. We thoroughly enjoyed the Saturday night dinner and music entertainment, which I'm sure the organisers won't mind me saying is rather like being transported back to an 80's Eurovision extravaganza! We were lucky enough to be on the Rico table with Ellen and Yvonne and the rest of the Rico team - as you can see from the pictures, we had a very enjoyable evening.


From left: Yvonne, Ellen, Helena and I

For me, one of the most rewarding things this year was meeting the German stockists that signed up to stock MillaMia last year at H & H. You may remember that I was unable to attend as I'd not long had Johan, and so building on our existing relationships with them was invaluable for me. Thanks to Garnwelt and Wolle Roedel for stopping by the stand - it was lovely to meet you!
(posted by Katarina)

Friday, 21 March 2014

ERIK and Erika

Once I had completed Erik's head last week, I pushed right on and began knitting the rest of him - well, he looked a little embarrassed without a body! This part was surprisingly quick and easy - just a little bit of simple shaping in order to make his bottom half nice and plump - all in stocking stitch, except for his bobtail which is knitted in garter stitch.

I blocked the main pieces and the tummy panel overnight and then using mattress stitch I seamed all of the pieces together. The legs are constructed in such a way as to make them bend slightly to the front, so it's a good idea when you are seaming these main pieces together to bear in mind that you will need to ease the smaller front section into the larger back half of the legs. This is actually where mattress stitch is invaluable - I picked up one bar from the top/smaller front section and 2 bars on the larger back section and it worked out pretty much perfectly.

It's always a good idea to take some time to stuff these knitted softies well. Too firmly and you can see the stuffing through the stretched out stitches - not enough and your Erik will be rather limp! I found, much to my dismay, that I hadn't really got enough stuffing to plump out mine quite as much as our original Erik, and as a result my bunny looks rather skinnier! Slightly more delicate, not so butch perhaps and now that I look at the face, even this seems to be a little more feminine than our original Erik, and so the lovely Erika - companion to Erik has been born! Not that this is a bad thing - we had great fun with Erik and Erika yesterday who made their debut on Instagram - you can follow the adventures of Erik @millamia_sweden or see my own Erik Easter Bunny project on Ravelry.


If you are keen to knit your own Erik, then this pattern is completely FREE from our website or on Ravelry. More excitingly though, we have launched a Competition over on our Facebook page where you can win the yarn to knit your very own Erik Easter Bunny! As a seasoned traveller, Erik is sending postcards from renowned destinations across the world, and all you have to do is guess correctly which city and country he is in and then post your answer in a comment under the picture, Simple!


There will be 4 chances to win over the course of the next 2 weeks, so hop on over and have a go!

(posted by Max)

Friday, 14 March 2014

'E' IS FOR Easter and Erik!

With Easter just around the corner, we at MillaMia HQ have been busy bringing a sweet new knitted character to life! Erik the Easter Bunny knitted in our Naturally Soft Merino in putty and snow is due to make his debut this week in a series of adventures and in conjunction with an exciting competition, but more about that next week . . .


I have been lucky enough to sneak out an early copy of the Erik pattern ahead of launch next Friday 21st March and have already started to knit him! He is simple enough, with much of the shaping achieved by basic increasing and decreasing but I thought it might be useful to show you how I put his cute little head together as I know that putting faces on knitted animals is very often the most difficult part to get right.


As you can see below, I have already knitted the head which is a flat, heavily shaped piece and therefore a little difficult to manipulate at this stage. I started by seaming the back of Erik's head with mattress stitch - yes! you already know that this is my favourite method of producing an almost invisible seam. I used a separate length of yarn to stitch the seam so that I can use the long ends to sew up the hole on top of the head and the other end to attach the head to the body.


Next the head needs to be stuffed firmly. Too little stuffing and you will find it difficult to achieve a nice round head shape, too much and you will begin to see the stuffing through the stitches. It is important that you leave the largest hole open at the moment so that you can position all the elements of the face easily.


I recommend a 'try and see if you like it' approach to positioning the face! Taking time at this point to make sure that you are completely happy with the features will save you much heartache later - the face, above all is what gives any knitted animal it's character. I have used safety eyes which can be purchased very cheaply at most haberdashers or craft stores. Remember to keep the seam at the back of the head and push the eyes through the knitted fabric approximately 1" apart. This can be tricky with the stuffing in but I find that seeing the head in its correct shape helps me to place the eyes much more effectively. Once you are happy with the position of the eyes, pull out some of the stuffing and turn the head partially inside out to expose the stalks of the eyes. Secure the 'washer' type backs and re-stuff.


The mouth and nose are a simple cross stitch with a double strand of snow yarn. Position this centrally and make sure to fasten off securely.

 
Next stitch up the end rows of the ears and tuck in any stray ends (I blocked these before stitching up to make it  little easier). The purple thread indicates the fold line - these ears have a little tip of grey. I used mattress stitch (of course!) to seam the inner white ear to the outer grey part.


Finally, position the ears on the head. I always pin them in place so that I can see if the whole face and head are visually symmetrical and most importantly, have the cute factor! Whip stitch the ears in place and the head is complete.


All Erik needs now is a body . . . !

Keep an eye on the Blog, FaceBook and Instagram next week to enter the Erik competition and find out where this rabbit about town has been visiting - he's quite the adventurer! Oh, and did I mention that this fun pattern is FREE?? Available next Friday from www.millamia.com or Ravelry, get your needles at the ready and knit up a colony of eggstatic Erik's for Easter!


(posted by Max)

Friday, 7 March 2014

A HANDMADE WEDDING

Not so many years ago, 'handmade' weddings were the norm. The cake would be made by a relative, the flowers by a friend of a friend - the food, photography, car and dress all taken care of locally and personally. Of course historically, the need to keep down costs was usually the motivating factor behind these wonderful contributions, but recent times have seen a resurgence of the handmade wedding not with saving money in mind, but in order to celebrate our new love of vintage, retro style and a heritage of handcrafting.

There are countless ways to achieve the 'handmade' look with a splash of vintage style - Folksy and Etsy both have beautifully crafted items to purchase if you don't have the time or skill to create them for yourself.

If you are determined to knit something for the special day either for yourself or as a gift then Ravelry too has a whole host of patterns. There are wedding ring shawls, socks, wraps, traditional Norwegian wedding gloves and even knitted cake!
 
We are incredibly privileged to share the wonderful story of a contemporary handmade wedding with you. Mandy McIntyre of Twisted Threads in Geelong, Australia has one super knitter customer, Ruth, who knitted her daughters wedding dress and reception suit entirely in MillaMia Naturally Soft Merino. The bride and groom, Sarah and Adam decided on the 'handmade' theme for their wedding with the most stunning results!


When we planned our wedding we wanted to do a 1950's as we both love this time and it is who we are. Our theme was handmade and we sourced from small enterprises or small individual businesses like Twisted Threads where all the yarn was purchased. When we heard about MillaMia wool it also fitted in with our theme.


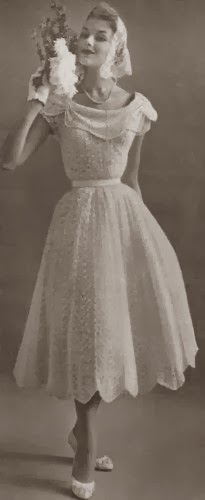
Both gowns were knitted by Ruth (Mother of the Bride) using MillaMia yarn as her gift to the couple. The Wedding Gown design was inspired by a vintage pattern found in an old Nomotta pattern book which called for a cotton yarn, however Ruth substituted MillaMia wool instead. As she was knitting, Ruth realised that she would need to make the gown as 2 separate pieces given the weight of the garment. The skirt took over 400 hours to make and required 25 balls of wool. After that Ruth gave up counting her time and the number of balls!

The Reception Suit design (as seen above), also knitted in MillaMia yarn was taken from 'Knit Vintage' by Madeline Weston and Rita Taylor.
 
 
We loved building Lego together so it was used as much as possible.
 
 
Bride and Groom bears also knitted by Ruth.
 

With very grateful thanks to Sarah, Adam and Ruth for sharing the heart-warming story of this beautiful wedding.
(posted by Max)